
Wondering how to grow big buds indoors?
Our simple and easy-to-follow guide will walk you through the entire process, from picking your seeds to harvesting your crop!
Growing cannabis indoors is a very rewarding experience. However, many guides make growing weed look hard.
This step-by-step grow guide will teach you everything you need to know about growing cannabis indoors.
Every stage of the process is covered, from picking and germinating your seeds, to harvesting and storing your buds.
Follow this guide and you will have your first harvest in as little as 12 weeks!
If you have any questions or feedback, please let us know in the comments at the end!
Free Cannabis Seeds? Check out my list of the best seed bank promotions – Including FREE Seeds, discount codes, and giveaways!
How To Grow Big Buds Indoors
Glossary of Terms
When learning about growing weed, you’ll come across a few terms that will be a little bit confusing at first.
Here is a brief explanation of the most common ones…
Cannabinoids – Chemical compounds secreted by cannabis buds that interact with receptors in our cells and produce cause different effects in the body
THC ( Tetrahydrocannabinol ) – A psychoactive cannabinoid produced by cannabis buds that is responsible for an energetic, uplifting high.
CBD ( Cannabidiol ) – A non-intoxicating cannabinoid responsible for the medical benefits of marijuana, treating everything from arthritis to epilepsy.
CBN ( Cannabinol ) – Another cannabinoid that is found in the finished product. It is psychoactive, but not as much as THC. It can make you feel sedated, or “stoned”.
Pistils – These are the long ‘hairs’ that stick out from the buds of female marijuana plants. They can be used to tell males and females apart. They’re often white, but some strains have different-colored pistils.
Trichomes – These are tiny, translucent glands that give buds their ‘sugary’ appearance and contain the most cannabinoids of any part of the plant.
Strain – The specific type ofweed that you choose to grow. Different strains have different characteristics that are important to know for growers and consumers.
Yield – The size and quantity of the buds that you harvest from your plants.
Training – Manipulating the stems of your plants to get the kind of shape that you want.
Nutrients – The substances that plants need for healthy growth. Plants can get these from the soil, or growers can buy nutrients to feed their plants.
PH – This is a measure of how acidic or alkaline something is. The pH of soil and water is important for growing marijuana.
Hydroponics – methods of growing plants indoors without the need for soil.
Germination – This is when the first root and leaves of a plant break through the hard case of seed and start to grow.
Vegetative Growth – The stage of growth where plants add structure (stems and leaves) and get bigger and stronger. It’s important for weed growers because plants need to be big, strong, and healthy enough to support the buds they will develop later.
Flowering – The stage of growth where plants grow the flowers they need to reproduce. For marijuana growers, the flowering stage produces the buds that contain most of the psychoactive substances.
Best Way To Grow Marijuana
Marijuana has the ability to thrive in a proper environment. It usually needs six resources in order to grow in any environment.
These are proper lighting, fresh air, a proper growing medium, ideal temperature, nutrients as well as water.
By giving your marijuana plants a combination of these resources, you will yield a healthy supply of cannabis plants.
Indoor vs Outdoors
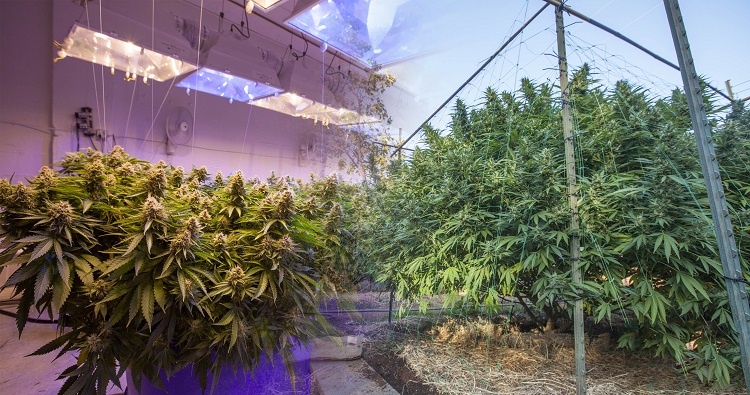
When you’re considering going marijuana, one of the first questions you’ll probably ask yourself is should you grow indoors or outdoors?
Irrespective of what you decide to do, you need to be aware that the environment has a direct effect on the outcome of your strain, and there are a few points to consider before making a decision.
Control
Growing marijuana indoors has long been a favorable decision mainly because you get to choose your location with a minimum amount of constraints and also the ability to have complete control over your growing environment.
Everything from the temperature, lighting to humidity, and carbon dioxide production is all controlled by you.
Therefore the outdoor elements no longer need to be a risk.
However, one of the drawbacks of growing marijuana indoors is that you cannot replicate the natural environment 100%.
Problems such as mites that appear in an indoor garden prove to be a challenge to get rid of.
Price

Irrespective of whether you choose to start an indoor growing environment or do it outdoors, there are upfront costs that you will incur.
If you decide to go with indoor growing, you need to know that’s it can be quite costly to replicate a habitat or environment for your cannabis and therefore when it comes to decreasing the cost of energy and increasing the demand from your cannabis, outdoor growing may be the only reasonably priced option.
Quality
Indoor cannabis has always been given the reputation of being top-of-the-line. The stains are beautiful and have great flavor profiles.
Everything from the bud to THC levels is carefully cultivated in an indoor environment.
This is also because indoor cannabis does not have to put up with the wind, rain, and other natural elements that often damage outdoor crops.
While the indoor bud is considered more aesthetically appealing, lots of people also enjoy the effects, taste, and aroma of cannabis grown outdoors.
Benefits Of Indoor Growing
To recap, growing marijuana indoors means that you have ultimate control over the growing environment with regards to temperature, lighting, nutrients, and so on.
While it may cost a little more to grow marijuana indoors due to creating the natural environment and using a lot of energy to do so, the quality of the yield is definitely worth the investment.
Indoor cannabis is aesthetically appealing as it is not affected by the outside elements and therefore is a perfect choice for many marijuana users.
The step-by-step guide will enlighten you on the basics of growing marijuana indoors.
Marijuana Grow Basics
Growing your own marijuana garden is easy, and there are a few simple steps that you need to adhere to in order to yield the best quality cannabis.
Firstly you need to set up your cannabis grow tent. If it’s your first project, you want to start small.
The smaller the growth, the less expensive for you as well.
It’s much easier to maintain a few plants as opposed to a large number, and your mistakes as a first-time grower will also be less costly.
Cleanliness is also essential to the growing process, and you need to make sure space is sanitized.
Another major factor in keeping your grow tent light-tight. Light leaks due to dark periods will have a detrimental effect on your plans.
Checking on your plants is also crucial, so make sure that you can conveniently view them as and when you want to.
Ensure that temperature and humidity levels are optimal and that you are able to view it as often as possible.
Choose your cannabis to grow lights wisely. LED is unbeatable.
Next, decide on a grow medium. There are different methods to choose from, including soil and hydroponics.
Next, determine what to grow your cannabis in.
The container you choose will depend on the system you’re using, the medium you are using as well as the size of the plants you intend on growing.
Some of the most inexpensive options include fabric or plastic bags.
Your plants will also need timely nutrients such as nitrogen, potassium, and phosphorus.
Micronutrients will be needed as well, and these are calcium, iron, magnesium, and copper.
Your plants will need to be watered.
Certain types of water contain a high amount of dissolved minerals that can build up in the root zone and affect nutrient uptake.
Some water may also contain fungus or other pathogens that are harmful to people and ultimately lead to disease.
So it’s best to filter the water that you use in your marijuana garden.
Ultimately, remember not to overwater.
Is It Legal To Grow At Home?
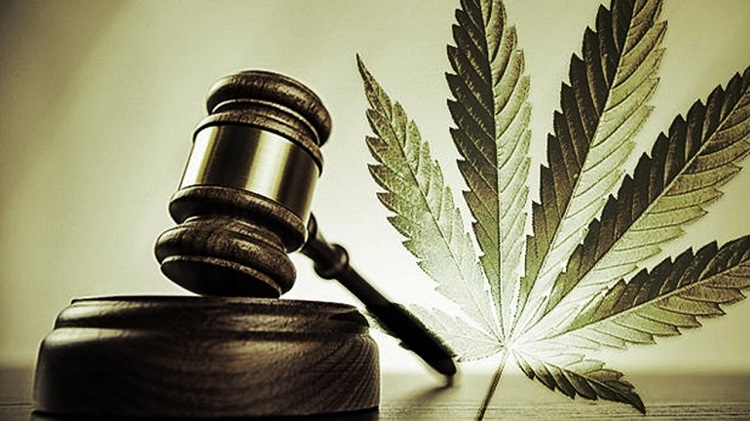
Yes, going cannabis in your home is now legal.
There are various medical marijuana laws that allow home cultivation; however, plant restrictions are still the same.
So even though it is legal, you may be restricted to growing just a few plants at a time.
Is It Dangerous To Grow At Home?
Growing marijuana at home is 100% legal, and it’s also completely safe provided you have a designated grow room or are making use of complete marijuana grow kit.
How Much Time Per Day Does It Take To Care For Your Plants?

In the beginning, it’s normal to want to check your marijuana plants profusely.
However, it is recommended that you check on them twice a day.
Once in the morning and once at night is ample care for your growing marijuana.
Also, be sure not to check them during the dark periods as you don’t want that type of light getting into marijuana plants.
How Does Weed Grow?
Marijuana or cannabis is a plant, and therefore, it grows in a similar way to other plant life.
However, if you’re growing it indoors, the environment will need to be optimal for the best results.
What Are The Basic Requirements?
Temperature
When growing marijuana indoors, you have to replicate the outdoor environment. So, ensure humidity levels are not too high or too low.
Nutrients
The proper nutrients will also need to be supplied to your cannabis plants, and these are nitrogen, phosphorus, potassium, calcium, magnesium, and copper.
Humidity
When we talk about humidity levels, it’s relative humidity, which basically refers to the amount of water vapor in the air.
And the amount of water that the air can hold is dependent on the temperature as well.
Ultimately, hot air holds more moisture than cold air.
So ultimately, while Indica grows best in dry areas, Sativa will grow naturally in warm, subtropical, or more humid conditions.
Light
Lighting is probably one of the most important aspects of growing marijuana indoors.
There are various types of options that you can use, including HPS, fluorescent, and induction lighting.
However, LED lighting has proven to be the best and most potent type of lighting for growing marijuana.
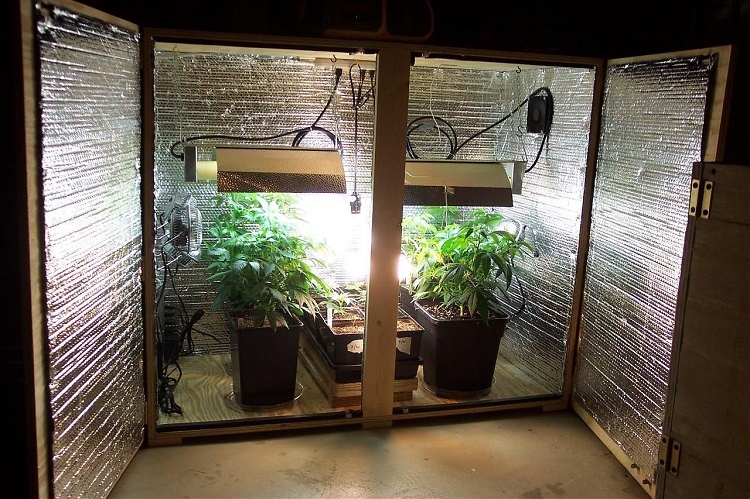
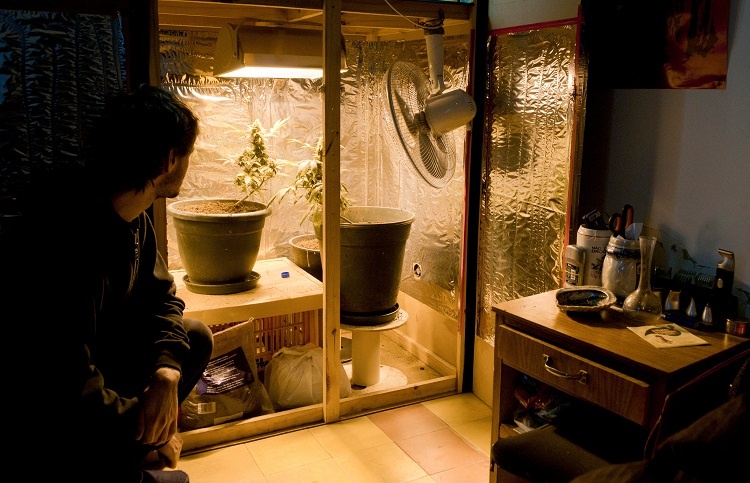
Step 1 – Set Up Your Grow Space

The first thing you need to do is to plan out space you’re going to grow in.
This will be different for everyone.
Some people will be growing a single plant in a cupboard, while others will be growing multiple plants in a dedicated room.
Grow Space Requirements:
Before deciding on your grow space, let’s take a look at some of the requirements for a good to grow space:
Reflective surfaces – Reflective surfaces will reflect more light to your plants. More light means more food for your plants and better results. You can create this effect with some white gloss paint or reflective materials such as mylar reflective sheeting.
Darkness – Your plants will need periods of complete darkness for them to flower properly ( we’ll cover this more later in the guide )
Ventilation – Just as we need oxygen to breathe, plants need carbon dioxide (CO2) to respirate. If the air in your grow space is not replaced regularly (every few minutes) the CO2 level will start to drop and this will negatively affect your plants’ ability to grow well. Ventilation also keeps the heat of your grow space regulated, as Marijuana grows best at around 75°F / 4°C ( more on this later ) Any standard rotating fan will do the job nicely.
Electricity – You’re going to need some sockets close by to potentially power your lights, fans, and ventilation
Worried about the smell of your crop?
If you want to grow discretely, then the smell of your crop is also something to consider at this stage.
Buying an inline fan ( that sucks the air from your grow room ) through some ducting and into a carbon filter will completely hide the smell from your grow room.
How many plants will fit in my grow space?
If you are not using any special techniques to train your plants, then one Marijuana plant requires roughly 1 sq foot of space to grow in.
This ensures that it has enough space to grow tall and wide without disrupting the growth of the plants around it.
Beginners tip: If you are just starting out, we highly recommend that you start with a single plant.
Growing a single plant means that you can give it your full attention and you can try to maximize its yield.
Once you are confident with the process, you can add plants to your second grow.
Measure the length and width of your grow space and multiply them.
This will give you your grow space in square feet.
Then, take this measurement and divide it by 1.
This will give you the number of plants you should grow in that space.
Example: I measure my grow space and it’s 3ft wide and 4ft long.
That means It’s 12 square feet ( 3ft x 4ft ) I then divide my 12 sq ft grow space by 1 ( the number of square feet each plant needs ) which gives me 12.
In this example, I would want to grow no more than 12 plants in my grow space.
Why you should invest in a grow tent
In our opinion, grow tents are a must-have for any efficient grow space.
Here are some of the top reasons why you should consider investing in one:
- Makes you grow more energy efficient
- Built-in reflective walls that direct all light back at your plants
- Provides complete darkness for you plants
- Reduces chances of pest infestations
- Odors much easier to manage with extraction fans and filters
- Easy to set up and hang lights from
- No light lost
- Portable
Which grow tent should you buy?
Grow tents come in all shapes and sizes, and there are loads to choose from.
The three grow tents below are the ones that I recommend that you look into. These are all great indoor grow tents.
They meet all the requirements of a good grow tent – metal framed with a good fabric density, viewing window and warranty.
Step 2 – Select A Strain

After you have your grow space figured out, you need to select the kind of weed ( strain ) you want to grow.
Each strain has its own distinct characteristics and offers the user different benefits.
Marijuana strains are usually grouped together according to these characteristics.
There are 5 strain groups you should know about before selecting your strain.
The strain you pick should depend on what characteristics you want it to have.
Indica and Sativa are the two main strains that produce the mental and physical effects that we are looking for from our buds.
1. Indica

Indica strain features
- Give a relaxing body high. Best for nighttime consumption.
- Relieve symptoms of anxiety, Insomnia, pain, and muscle spasms.
- Produce dense buds covered in resin.
- Grow short and wide – perfect for smaller grow spaces.
- Grows better in cooler environments.
Best Indica strains for beginners
Afghan Kush – This pure Indica strain has very compact plants, a fast flowering stage, and high yields…The taste reminds people of Afghani hashish and the high is strong, relaxing, and great for insomnia.
Black Sugar – Good news for growers and for people who want to relax at the end of the day. Black Sugar plants will produce REALLY high yields of buds that will help anyone to forget their troubles.
2. Sativa

Sativa strain features
- Have an energetic and uplifting high. Best for daytime consumption.
- Relieve symptoms of ADD, Depression, fatigue, and mood disorders.
- Grow tall and thin – looks impressive!
- Produces long buds.
- Grows better in warmer environments.
Best Sativa strains for beginners
South African Kwazulu -These plants won’t stink out the place while growing, and are extremely mold-resistant. The high is very long-lasting and energetic
Kilimanjaro – These plants won’t need perfect conditions to grow well, and the buds will give you a potent, energetic high.
Cannelope Haze -These tall plants will produce beautiful, melon-tasting buds that give a really thought-provoking high
3. Hybrids

Hybrids are a mix of both Indica and Sativa strains and have been carefully bred to inherit the best characteristics of both.
Hybrids can be created to be Sativa dominant, Indica dominant, or an even split.
When purchasing from an online seed bank, make sure to check the descriptions carefully to know what characteristics your plants will have.
Best hybrid strains for beginners
Northern Lights – One of the most famous cannabis strains. Known to flower very quickly and produce lots of resin, it’s also easy to grow for beginners. The taste is sweet and the high is very relaxed.
Gelat.OG – This mostly Indica strain is famous for it’s ‘happy’ high and great citrus taste. The yields are pretty good too.
Pineapple express – This hybrid gives fantastic yields. The aromatic buds will give a high perfectly-balanced between energy and relaxation.
4. Ruderalis

These strains are extremely low in THC and CBD, making them useless for consumption on their own.
However, Ruderalis strains have a unique trait in that they will automatically flower after 20-30 days without long periods of darkness.
This makes them appealing to breeders who mix them with Indica or Sativa strains to create quick fast-growing, bud-producing auto-flowering strains.
Ruderalis key features…
- Looks like a roadside weed
- Low in THC and CBD
- Not good for consumption on its own
- Automatically flowers after 20-30 days regardless of light cycle
- Usually mixed with Sativa or Indica strains to produce auto-flowering strains
5. Auto-flowering
Bud-producing auto-flowering strains are created by crossing high THC or CBD strains ( Indica or Sativa) with auto-flowering strains like Ruderalis.
They are popular with beginners due to their fast-growing cycle and the fact that there is no need to alter your light-cycle to start flowering.
Auto-flowering key features…
- A mix of Sativa, Indica and Ruderalis
- Flowers quicker than Indica, Sativa and Hybrid strains
- Automatically flowers after 20-30 days regardless of light cycle
Best Auto-Flowering strains for beginners
Auto Bubbleliciou – Will give you decent yields of sweet-tasting buds in as little as 12 weeks after germination.
The euphoric high is great for stress relief.
Auto Lemon OG haze – For those who want a clear, uplifting Sativa-style high from a fast-growing strain.
Northern Lights Auto – All the great characteristics of Northern Light in a faster-growing package.
Beginners recommendation: If this is your first grow, I recommend that you pick a high yield auto-flowering strain. Due to their Ruderalis genetics, they are more resilient to common mistakes!
Step 3 – Get some seeds ( or clones )

Now that you’ve chosen the type of cannabis ( strain ) you want to grow, you need to get hold of some high-quality seeds.
It’s important to select high-quality seeds if you want to grow high-quality bud. Bag seeds, or seeds that you find lying around should be avoided.
What do good quality seeds look like?
Mature seeds
Mature, healthy seeds are usually dark brown with darker stripes or spots ( see image above ).
Mature seeds will give you the best chance of growing productive, bud-producing plants.
Immature seeds
Pale green seeds are immature and have much less chance of growing into bud-producing plants.
Immature seeds will still grow, but they will just end up occupying some of your grow space with weak plants.
Feminized seeds
Unlike most plants, Marijuana has separate male and female plants.
Seeds are usually around 50% male and 50% female.
Only the female plant is capable of producing the buds that we’re after, so you want to make sure that you purchase female seeds.
You can guarantee you purchase female seeds by buying feminized seeds
These seeds have been specially treated through a chemical process to force two female plants to breed.
This guarantees that the seeds they produce will be all-female.
Feminized seeds are a little more expensive than regular seeds.
However, they are definitely worth the extra cost as you won’t waste your time accidentally growing a male plant that doesn’t produce any buds.
NOTE: If you want to experiment with breeding or producing your own seeds, you’ll need male plants as they are required for pollination of the female plant.
Where do I get seeds from?
Ordering from a good online seed bank is the best option.
Online seed banks usually have lots of useful information about the strain and what to expect from your plant during its lifecycle.
If you buy online, make sure that the seed bank ( a lot are based in the UK and the Netherlands) will ship to your area.
Looking to buy seeds?: Check out my in-depth guide on the best seed banks to order from. My favorites are ILGM, Seedsman, and MSNL.
Isn’t it illegal to buy cannabis seeds online?
In the USA, buying seeds online is Illegal at the Federal level.
However, each US state has its own laws and many allow you to purchase Cannabis seeds online.
In the UK, it is legal to buy and sell cannabis seeds, but illegal to germinate them.
Using clones instead of seeds
Cloning is a technique where you take a cutting of a successful plant and let it develop its own root system, creating an exact replica of the original plant.
Pro’s of using clones
- Cost – When done right, cloning can provide an ( almost ) unlimited amount of high-quality plants for free, removing the need to purchase seeds, which are fairly expensive
- Speed – Clones remove the need to germinate your seed, so you basically skip the first stage of your plant growth, speeding up the entire process.
- Quality – If you know the mother plant has produced great buds, its clones are pretty much guaranteed to produce the same quality under the same conditions.
Con’s of using clones
- Beginners – Obviously, you need to already have a bud-producing plant to take a cutting from, so if this is your first grow, getting hold of a clone will be difficult.
- Variety – Clones limit you to the strains you have already grown. One of the best parts of growing cannabis is trying out different varieties.
- A gradual reduction in quality – Clones will share the original mother plants qualities. However, she will only live between 5-10 months. Clones that are cloned from other clones will result in a gradual reduction in quality.
Step 4 – Select A Growing Medium

Now that you’ve picked the type of cannabis you want to grow and have ordered some seeds, you need to select a growing medium.
The growing medium is simply what your plants will be grown in.
Soil vs Hydroponics
There are two main ways you can choose to grow your cannabis plants indoors; with soil or with hydroponics.
Hydroponics are simply different ways of growing your plants without the need for soil.
If you are a beginner, we recommend growing in soil.
It’s much more forgiving to newbie mistakes and keeps things simple.
However, let’s take a look at the pros and cons of using soil and hydroponics, as well as some frequently asked questions about both.
Pros of growing in soil
- More forgiving of mistakes. Better for beginners
- Usually less expensive than most hydroponic methods
- Easier to set up and maintain than most hydroponic systems
- Better flavor from your buds
- Organic, eco-friendly
Cons of growing in soil
- Will take longer to grow than hydroponic methods
- Smaller yields than hydroponic methods
- Requires more space than hydroponic methods
Growing in Soil FAQ
Which soil should I use?
You have two options when it comes to your soil:
1. Mix your own super soil – This is when you buy some regular organic potting mix soil and add the required nutrients throughout your plant’s life cycle.
Fox Farm has a great trio of fertilizers that are perfect for cannabis growth.
They also provide a very handy feeding schedule to ensure you’re adding the right nutrients at the right time.
This option gives you more control over your nutrients.
2. Buy premixed super soil – This is when you buy soil that has already been mixed.
You don’t need to add any extra nutrients, you just add water!
This Is the best-premixed soil we know of.
If you choose this option, we also recommend that you purchase a less “nutrient intense” premixed soil such as this for your seedlings, so that they don’t get exposed to nutrient burn ( more on this later ).
This option is better for beginners.
We’ll discuss more about monitoring nutrients when we move on to the growing section of this article.
TIP: Don’t buy miracle-grow or any other product that uses ‘extended release nutrients’. This will damage your plants when they reach flowering.
What soil containers should I use?
Any plastic or ceramic plant pots like these ones can be used to grow with soil indoors, as long as they:
- Have holes to allow water to drain out.
- Have a container ( saucer or tray ) to catch water runoff.
Here are some of the most commonly used for growing cannabis:
Smart pots ( fabric pots )
There are very popular in the cannabis community.
Made from stiff fabric, they provide your plants with lots of oxygen, leading to faster grow times and less chance of over-watering.
Requires an extra tray to capture water runoff.
Air pots
These are specially designed plastic pots that will stimulate your plants to grow lots of lateral roots as well as provide them with more oxygen.
This will lead to faster grow times and healthier plants
How to use soil containers
There are two methods you can opt for when it comes to containers
Option one: Keep your seedlings in the pots you plan to use for the plant’s entire lifecycle – This will avoid the risks (and the work!) of transplanting. However, your seedlings will grow more slowly this way. This is because the roots of your seedlings will get less oxygen in a large pot of soil.
Option two: Grow your seedlings in small containers and transplant them to larger pots as required – The roots of your plants will get more oxygen this way. This will make them grow faster, so use this method if you want to save time. You should transplant them to a bigger container when the leaves grow past the edge of the original container (looking from above).
Hydroponics
There are a lot of different ways to grow hydroponically, but nearly all of them share two main characteristics:
The soil which holds the roots of your plants is replaced by another medium (substrate).
All the nutrients needed by your plants are dissolved in the water you give them.
Pros of using Hydroponics
- Growing with hydroponics is faster than growing with soil.
- Bigger yields and higher quality buds.
- Requires less space than growing with soil.
- Efficient use of water due to it being recycled by the system.
- Less chance of pests and diseases.
- Gives you more control over your plant’s environment.
Cons of using Hydroponics
- More complicated to set up than soil
- Most hydroponic systems are a little more expensive to set up initially than soil
- Less resilient to mistakes than soil
Hydroponic systems
Here are the most common hydroponic systems you can use, with a brief explanation of each:
Wick System – Plants are put in pots that are filled with a substrate (alternative to soil). An absorbent fabric wick extends down into a reservoir of nutrient solution. Roots absorb the nutrients that they need and fresh solution flows up the wick.
Drip System – A tank with an electric pump (either continuous or on a timer) that delivers nutrient solution through tubes to your plants in their substrate (individual pots or large tray). Can also be used with soil.
Nutrient Film Technique ( NFT ) – A step up in complexity and the initial cost is quite high. Your plants are held in a really small quantity of substrate above a tray. A pump delivers nutrient solution from a reservoir to one end of the tray. The tray is slightly sloped so that the nutrient solution runs slowly down over the roots of all your plants.
Deep Water Culture ( DWC ) – In DWC systems, the roots of your plants are submerged in your nutrient solution, but the oxygen they need is supplied by bubbles created by a pump and an ‘air stone’. The extra effort to set this up is worth it if you want REALLY big yields.
Step 5 – Choose A Grow Light

Light is THE most important part of your grow setup.
It’s what feeds your plants, giving them the energy they need to grow big, flower, and produce tasty buds.
Unfortunately, you can’t use standard house bulbs.
There are 3 main types of grow lights that are suitable for growing marijuana indoors:
Fluorescent lighting
The twisted bulbs that light your home (compact fluorescent lights, or CFLs) can also be used for growing marijuana indoors.
You can also use other types of fluorescent lighting, such as long tubes (T5s), for growing marijuana.
These lights can often be found in garden supply centers.
Pros of using Fluorescent lighting
- Price – fluorescent lights are cheap to buy and can be found in most garden stores
- Low power consumption – They won’t add too much to your electricity bill, and they won’t produce too much excess heat.
- Good for small spaces – You can use fluorescent bulbs in very small growing spaces (CFLs are best for tiny spaces and T5s are a good choice for long, low spaces)
Cons of using Fluorescent lighting
- Yield – These kinds of lights won’t stimulate your plants to produce the biggest yields.
- Position – If you’re using CFLs (twisty bulbs), you’ll have to move them around often for all parts of your plants to get enough light.
- Tall plants – The light from fluorescent bulbs or tubes won’t penetrate the lower parts of your tall plants (this will reduce your yield)
TIP: If you’re just looking to experiment with one small plant and aren’t too worried and yield or quality, fluorescent lights are a good, cheap option.
HID Grow Lights
High-Intensity Discharge (HID) lights have been popular for indoor growing for a long time, and they are still the most common lights used by growers.
Two common types of HID light are Metal Halide (MH) lamps and High-Pressure Sodium (HPS) lamps.
A lot of growers use a combination of these two types ( more on this later )
Pros of using HID lighting
- Yield – HIDs will help your plants to produce lots of big buds (at least double the yield of plants under fluorescent lights).
- Distance – HIDs are standardized and this makes it easy to work out how far they should be from your plants (unlike LEDs).
- Efficiency – Even though they cost a lot more upfront than fluorescent lights and use more power, HIDs are more efficient (per gram of buds produced).
Cons of using HID lighting
- Cost – HID lights have a few different components (bulbs, ballasts for converting power, hoods for reflecting the light downwards) and they don’t come very cheap.
- Heat – Using HIDs produces a lot of excess heat, so you’ll need an exhaust system and fans to remove it.
- Power consumption – Even though they’re efficient (per gram of marijuana produced) you’ll have to factor in the extra cost on your bill.
TIP: HID’s are a better fit for the intermediate to experience growers due to their setup and management. However, they do produce great results.
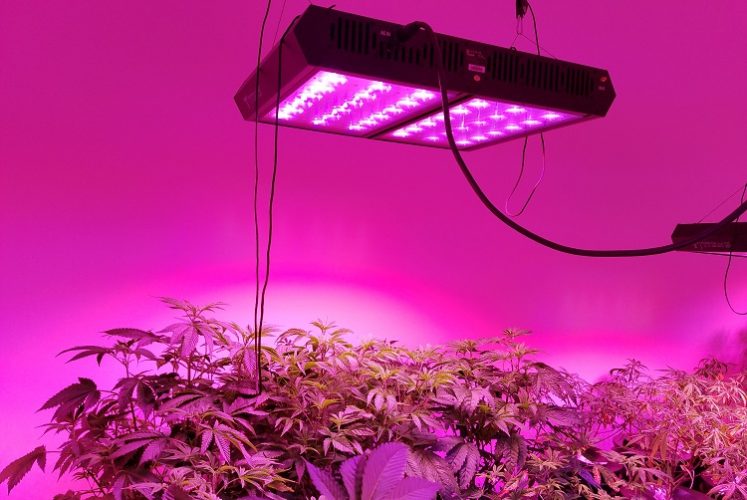
LED Grow Lights
Marijuana growers have been using LEDs ( light-emitting diodes ) as an excellent alternative to fluorescent bulbs and HIDs for a few years now.
The technology has improved so much that many experienced (and commercial) growers are replacing their ‘classic’ HID setups with LEDs.
Pros of using LED grow lights
- Save energy – LED grow lights are much more efficient than HID grow lights, meaning you save money on your power bill.
- Low heat – LED won’t get as hot as equivalent HIDs, reducing your need for extra fans and vents.
- Easy to set up – You just need to plug it in and you’re off.
- Durability – Good-quality LED units will last for many grows without needing replacement parts such as bulbs.
Cons of using LED grow lights
- LEDs for growing are becoming cheaper, but will still cost much more than equivalent HIDs. They may cost as much as a full growing setup with HIDs or fluorescents.
- Unlike HIDs, it’s difficult to know exactly how much power an LED uses and how much light it gives off. So it’s a challenge for a beginner to know exactly which unit they will need and how far it should be from the tops of their plants.
TIP: In our opinion, LED grow lights are hands down the best grow light for your grow setup. They are easy to set up, manage and they provide great results!
What power of grow light do I need?
The absolute best way to decide what power of LED grow light you require is by it’s PAR (usable light) output.
However, you can also use watts as a rough guide too.
You need roughly 32w of actual power per square foot of growing space.
So that’s roughly 32watts per plant if you have 1 plant per square meter.
In the example at the start of this article, we worked out that I had a growing space of 12 sq ft ( length x width ) and could grow 3 well-spaced plants in this space.
Therefore, we need to take our grow space sq ft calculation and times it by 32w, which gives us 600w
Therefore, for a 3ft x 4ft grow space and 3 plants, I would need a 600w grow light for my grow space.
Ok, Let’s Get Growing!
How To Grow Weed Indoors
You should no be prepared to start growing. Here’s a checklist of the items you should have ready:
- A grow space
- Seeds
- Soil
- Nutrients ( if required )
- Grow light
- Fans / ventilation
- A grow tent ( optional )
This part of the guide will take you through exactly what you need to do at each stage of your plant’s growth cycle ( whether you’ve decided to grow in soil or by another method )
Here’s what we’ll cover:
- Germination
- Seedlings
- Vegetative Growth
- Flowering
- Harvesting
- Drying and Curing
How long before I can enjoy my buds?
The time it takes from planting your seed to harvesting your buds can vary quite a bit due to 3 common factors:
1. Genetics
The genetics of the strain of marijuana that you are growing.
The strain of the plants you grow will determine the time they take to go through the flowering stage.
A decent online seed bank will provide you with this information.
2. Growing method
You’re growing medium and method ( soil or hydroponics ).
Hydroponic methods will generally lead to faster vegetative growth.
You could save 2-4 weeks (for a similar yield) vs growing in soil.
Your patience
Patience is key if you want to produce a good yield
If you want your plant to be able to support a lot of buds, you need to have patience.
You take measures to speed up the process by forcing your plants to flower early, or by using an auto-flowering strain, but this won’t give you the biggest and best buds.
Depending these factors, an average time ( from germination to enjoying your buds ) can be anywhere from 12-20 weeks.
Step 6 – Germination

It’s now time to get our newly bought seeds to start growing roots and sprouting a new cannabis plant. This process is called…
Germination
This process is when the hard case of a seed breaks and a root ( or radicle ) appears and heads downwards.
A shoot then appears and heads upwards. This shoot will have a few small leaves ( cotyledons ).
How do I make my seeds germinate?
In nature, germination happens when a mature seed finds itself in the right conditions for growing.
For most plant species ( including marijuana ) the conditions are the correct levels of moisture, air, and warmth (light is not needed for the seeds of most plants to germinate).
So, you need to provide your seeds with the correct conditions for germination.
There are a few ways to do this…
Seedling plugs make germinating seeds simple.
They are basically a lump of soil with the perfect mixture of nutrients for germination.
They have a hole in the middle that you pop your seed in, cover, and then water as instructed.
Pros of using seedling plugs:
- High germination success rates compared to other methods
- Low heat – LED won’t get as hot as equivalent HIDs, reducing your need for extra fans and vents.
- Simple to transfer into soil after germination
Cons of using seedling plugs:
- They only come in large multi-packs
- Cost more than other methods
How to Use Seedling Plugs To Germinate
Step 1 – Soak your seeds and rapid rooter in some purified water for one hour
Step 2 – After an hour, take the seeds and plug them out of the water. Shake the excess water off the plug. You want it to be moist but not soaked.
Step 3 – Put one seed in the hole that is provided in the middle of the rooter plug. Pinch the hole shut. Make sure that it is completely covered. No light should get in.
Step 4 – Place the plug in a humidity dome ( or something homemade that will act as a greenhouse, such as empty plastic packaging from the supermarket )
Step 5 – Place the box by a bright window, or ideally under some fluorescent bulbs. LED grow lights and HIDs can be used but must be kept far enough away that you can keep your hand on top of the box for over 10 seconds without it burning.
Method 2 – Germinate In Standard Potting Soil
This is similar to the way nature does it.
You germinate your seed directly in your plant pot with standard organic potting soil.
The soil should have no added nutrients as they will make the soil too “hot” for germinating.
While this might seem like the easiest method, it has some pretty big drawbacks:
Pros of germinating directly in potting soil:
- Cheaper than buying seedling plugs
- You won’t shock your seedling with a new environment as you will be germinating it in the soil you use to grow
- Simple to transfer into the soil after germination
Cons of using potting soil:
- You won’t know if your seeds have germinated until the shoot breaks through the surface of the soil
- Germination in potting soil has a much lower success rate than seedling plugs. Seeds are fairly expensive, so you don’t want to waste too many!
How to Germinate In Potting Soil:
Step 1 – Prepare your pot/container and add your potting soil. Push seeds just below the surface (1-2 cm)
Step 2 – Keep the soil moist (NOT wet) and warm. You can keep the soil warm with a standard incandescent light bulb in a desk lamp pointed at your seedling.
Step 3 – Wait! It might only be a few hours, or it might be a few days before you start to see shoots. Older and harder seeds might take longer, but any seeds that take much longer than a week have probably failed to germinate.
Method 3 – Germinate With A Paper Towel
Yup, Marijuana seeds can be germinated on a wet paper towel.
There are a couple of reasons you might want to try this method, but there’s also a drawback:
Pros of germinating with a paper towel
- Cost – Obviously, paper towels are much cheaper than propagation kits
- Easy to do
Cons of germinating with a paper towel
- You can easily damage your germinated seeds when checking or transplanting them.
- Germination in potting soil has a much lower success rate than seedling plugs. Seeds are fairly expensive, so you don’t want to waste them!
How to Germinate With Paper Towels
Step 1 – Wet a paper towel and spread a few of your seeds on one half, then fold the other half on top of the seeds.
Step 2 – Wait! Check on your seeds every few hours to see which have germinated (you’ll see the white root pushing through the seed case) and make sure the paper towel hasn’t dried out.
Step 3 – Transplant your germinated seeds (do this for each seed when you see the white root sticking out, don’t wait for the others to catch up) to their growing medium. Try not to touch the root with your fingers, and carefully push your germinated seeds into your moist growing medium 2-3 cm deep, with the root pointing downwards.
How many seeds should I germinate?
If you’ve already decided how many plants you want to grow (based on your needs and the space you have), then how many seeds you should use for germination is a pretty simple calculation.
It depends on both the type of seeds that you have and your germination method.
Use the following table to determine how many seeds you need to germinate.
The numbers in this table depend on you handling your germinated seeds with care:
| Seed type | Germination method | Number of plants | Number of seeds |
|---|---|---|---|
| Non-feminized | Soil | 2 Plants 4 Plants 6 Plants | 9 Seeds 18 Seeds 27 Seeds |
| Non-feminized | Paper towel | 2 Plants 4 Plants 6 Plants | 6 Seeds 12 Seeds 18 Seeds |
| Non-feminized | Seedling plug | 2 Plants 4 Plants 6 Plants | 5 Seeds 12 Seeds 15 Seeds |
| Feminized | Soil | 2 Plants 4 Plants 6 Plants | 5 Seeds 10 Seeds 15 Seeds |
| Feminized | Paper towel | 2 Plants 4 Plants 6 Plants | 4 Seeds 8 Seeds 12 Seeds |
| Feminized | Seedling plug | 2 Plants 4 Plants 6 Plants | 3 Seeds 6 Seeds 8 Seeds |
Once your seed has germinated ( sprouted green shoots and white roots ) it is now officially a seedling.
Transfer your seedling to your chosen grow medium ( soil or hydroponics ).
Step 7 – Seedling Stage

Seedlings are tiny plants trying to establish the roots and leaves they need to develop into adult plants.
Marijuana seedlings are extremely delicate and need to be treated carefully.
They can easily be damaged or killed if you don’t look after them properly.
Special treatment should be given to seedlings for about 2 weeks.
Here, we’ll go through a few of the special requirements of seedlings:
Lighting ( Seedling Stage )
Seedlings need light to grow, but higher-intensity lights with more heat will damage them at this early stage.
There are two possible solutions to this problem:
1. Use lower-intensity lights – Cheap fluorescent lighting is very useful for young seedlings. You should keep these lights about 6 inches from the top of your young plants. If the lights are too hot for your hand after 10 seconds, you should move them further away.
2. Use an LED Grow light – Many LED grow lights come with a setting that optimizes them for the vegetation stage. Again, once you’ve hung your light, hold your hand above your seedling. If it’s too hot on your hand after 10 seconds, it’s too hot for your seedling – move it further away.
PRO TIP: If you’re growing clones instead of using seeds, you clones can tolerate higher-intensity light than regular seedlings.
How much light do my seedlings need?
You should give your seedlings 18+ hours of light per day (the same as you will give your plants during vegetative growth).
Make sure to check them often, because seedlings can grow really fast.
They could get damaged if they grow too close to the light.
You can leave your lights on for 24 hours a day if it’s easier for you.
Humidity (Seedling Stage )
Humidity is important to the health of your seedlings.
Seedlings prefer higher humidity compared to adult plants.
This is because they will absorb water through their leaves to help them get enough when their roots are small.
If you need to increase humidity you can spray water on the walls and floor of your space and decrease the ventilation
To decrease the humidity in your space, increase the ventilation.
Basically, keep your seedlings warm and moist!
Nutrients & Watering ( Seedling Stage )
If there’s one key thing to remember about watering and nutrients for seedlings, it’s not to overdo it.
Too much watering can stop the tiny, delicate roots of your seedlings from getting oxygen and can even kill them.
Your plants can also be ‘burned’ by too many nutrients at this stage.
Growing with Hydroponics
Water – If you grow in a hydroponic system, this will supply all of the water your young plants need. In some systems, your plants’ roots will need to grow down to meet the water supply. Before they reach it, you’ll need to hand-water your plants to stop them from drying out (you’ll be amazed how quickly the roots grow!)
Nutrients – As for nutrients, seedlings need the same ratio of NPK (a common one is 3-1-1) as your plants will need in their vegetative stage but at about a 1/4 of the overall strength. Too many nutrients can easily damage seedlings. Most nutrient packs will give a feeding schedule to follow.
Growing with Soil
Water – If you’re growing in soil, the rule of thumb is that if you poke your finger in the soil up to the first knuckle and it feels dry, you need to water. Seedlings in large pots need watering much less often than seedlings in small pots that you plan to transplant later
Nutrients – Your seedlings will get all the nutrients they need from the soil you planted them in at this early stage, so it’s NOT necessary to feed your seedlings with extra nutrients.
Step 8 – Vegetation Stage

When your seedlings start growing leaves with a larger number of fingers (5-9), they have officially reached the vegetative stage of their growth.
This is when your plants develop the structure and the root system they need to produce big healthy buds during flowering.
Most indoor growers will keep their plants in the vegetative stage for 1-2 months.
If you have limited space or time, you can make this shorter by forcing your plants to flower early, but allowing your plants more time to get bigger and stronger will increase the size of your harvest.
A lot of things happen during this stage, and there are a few actions the grower may need to take.
Some of these actions are optional, depending on the amount of time you have to invest in getting the best out of your plants.
1. Transplanting Vegetation Stage
Transplanting is when you move your plants from their original container to another one.
This could be either to ‘plug them in’ to your hydroponic system or to move them to a larger soil container once the plant is too big for the current one.
Growing with Hydroponics
For hydroponics, you’ll want to transplant your seedlings into your system as early as possible.
Try not to disturb them at all for some time after transplanting.
In some systems, the roots are exposed and are very easy to damage.
Growing with Soil
If you’re using soil and started with small containers, your plants’ roots will quickly grow to the edges of the container.
You don’t have to transplant them, but a bigger container will let your plants grow more.
This will lead to a better yield.
How to transplant in soil:
Step 1 – Prepare a big enough hole in the soil in your new container, and make sure the soil is moist
Step 2 – If you started in a disposable cup, just carefully cut away the whole thing. If not, you’ll need to gently pull your plant and soil out of the old container.
Step 3 – Put the plant with its attached soil into the hole in the new container.
Step 4 – Gently move it around to make sure there is good contact with the new soil.
Step 5 – Cover the old soil with a thin layer of the new, and gently push it down (not too hard- remember that roots need access to air).
Done right, multiple transplants to bigger containers can speed up vegetative growth.
Done wrong, it can ‘shock’ the plant and cause it to stop growing or even die.
Some growers won’t have the time (day-to-day) for this process and will just use a big container to start with.
2. Promoting Good Growth (Vegetation Stage)
As you already know, the best buds are fat and dense.
We’ll talk more about how to get dense buds in the next stage (flowering), but good vegetative growth is also important for the final product.
Dense buds are heavy, so you’ll want your plants to develop:
- A strong enough structure (stems) to support the heavy buds.
- A healthy root system to supply your plants with the nutrients they’ll need for flowering later.
- Large healthy leaves. Leaves are the solar panels of your plants. Healthy leaves lead to more healthy leaves, which will lead to healthier, more potent buds.
Paying attention to the following things will help vegetative growth:
3. Lighting ( Vegetation stage )
You should give your plants 18-24 hours of light per day during their vegetative stage.
24 hours can lead to faster growth, but a lot of growers will give their plants a short ‘night’ (6 hours maximum).
Saving electricity and maintaining the temperature of your space are two practical reasons why you might want some dark periods.
4. Watering & Nutrients ( Vegetation stage )
Let’s take a look at the watering and nutrient needs of vegetating plants in different mediums:
Growing with Hydroponics:
Watering Your plant roots should be well established now and have access to all the water they need from whichever hydroponics system you decided to use.
Nutrients – As for nutrients, you should be using a ‘vegging’ at this point which will have more nitrogen (N) than phosphorus (P) or potassium (K) (3-1-1 is quite common) Most good nutrient packs come with instructions of which nutrient to use when to use it and how much.
It’s important not to change brands during a grow or mix products from different brands together.
This is usually a disaster because you can’t be sure of the balance of nutrients in different brands’ products.
Growing with Soil
Watering – As your plants get bigger, they’ll obviously need to be watered more often. You should regularly check if the soil is dry up to the first knuckle of your finger. If it is, then you need to water it. Overwatering won’t kill in a plant in vegetative growth like it would a seedling, but too much water can slow your plants’ growth right down.
Nutrients – For the first 4 weeks after germination, your plants are unlikely to need extra nutrients. Beyond this, you can start using nutrients dissolved in the water you give to your plants. (remember you WON’T have to do this if you made or bought an organic super-soil).
This should have a similar NPK ratio to the ones that hydroponic growers will use (see above).
Soil growers also have the option of fully-organic nutrient solutions.
Problems to watch out for
Nutrient Burn – If you notice that you vegging plants’ leaves have discolored tips (yellow or brown), this means they’re suffering from ‘nutrient burn’. To solve this you can ‘flush’ some of the nutrients by using a larger quantity of plain water in your next watering. Make sure not to use too much and that your containers are draining well.
pH problems – If you notice that the leaves on your plants have unusual coloring (very light green, very dark green, yellow or brown) it can be a sign that your plants are not happy with their environment. Although the discolorations are signs that your plant isn’t getting the nutrients it needs, the problem is FAR MORE LIKELY to be caused by incorrect pH than by you not giving your plants enough nutrients. This is because the wrong ph can stop your plants’ roots absorbing nutrients.
How can I check for and solve problems with pH?
Remember that using thebest organic soil as your growing medium means that you probably won’t have to worry about pH problems.
However, If you’re growing with ‘ordinary’ soil or hydroponically, checking and adjusting pH isn’t complex or difficult, and can save you the disappointment of weak and dying plants.
Here’s how to do it:
How to check ph
In soil – Using a pH testing kit or digital pH pen (see the ‘soil FAQ’ earlier in the guide), test the water that runs out of your containers after you next water your plants. You’re looking for a pH of 6-7
Hydroponics – Test the water from the tanks in your system (try to do this just after the next time you add nutrients to your system because they can affect pH level) You’re looking for a ph of 5.5-6.5
How to adjust pH
Growing with Soil – If your pH was too high (alkaline), mix a tiny amount (a few drops) of ‘pH Down’ into the water for your next watering. Test the runoff water again and repeat if necessary. If pH is too low (acidic) add a small amount of ‘pH Up’ to your water. It’s important to remember that ‘pH down’ has a stronger effect than ‘pH Up’ so follow the instructions they provide carefully.
Growing with Hydroponics – The same as for soil, but you’ll be adding you, pH adjusters, to the water in your tanks.
5. Temperature & Humidity (Vegetation Stage )
Plants in vegetative growth are less sensitive to temperature and humidity than seedlings and flowering plants.
There are just a few things to remember:
Try to keep the temperature in your space between 20-30°C (70-85°F). Younger, smaller plants ( germination to 4 weeks ) will grow better at the high end of that temperature range with higher humidity (70%). Older plants can grow just as well at the lower end of the temperature range, with lower humidity (50%).
The easiest way to regulate temperature and humidity is with ventilation (see the ventilation section earlier in the guide for more information on this).
If your temperature is too high, even with ventilation, you can try switching to an 18/6 light schedule, with the 6 hours of darkness in the hottest part of the day.
Yield – Plants with more potential bud sites (each junction between the main stem and another is a potential bud site) will obviously yield more buds after flowering. So for maximum yields, you’ll want your plants to stay in vegetative growth until they have multiple sites (remember you can influence this by training and pruning). That being said, when growing indoors to ensure you have the biggest yield possible you want to ensure you have the best indoor strains for your needs!
The average – Most indoor growers will force their plants to flower after 4 – 8 weeks of vegetative growth (shorter for hydroponics and longer for soil). This is a good rough time frame for less experienced growers.
Time – If you don’t have time to wait for your plants to grow big, you can start flowering early. Depending on your strain, flowering will take 8 to 12 weeks, and drying and curing an absolute minimum of three weeks (more on this later in this guide). So if you need finished buds in 3 months, it’s time to start flowering, but remember that longer vegetative growth will eventually lead to a bigger yield.
Step 9 – Flowering

Finally, you’re now at the most exciting stage!
Flowering is when your plants begin producing the large, potent buds that are the end goal of your grow.
It ends when your buds are ready to harvest!
Most growers will tell you that plants in the flowering stage are a bit more difficult to look after than in the vegetative stage.
Flowering plants are more sensitive and don’t recover as well from problems.
This next part of the guide will take you through the flowering stage and the things you will need to do to support your plants during this time.
How do I make my plants start flowering?
Outdoors, marijuana plants automatically begin to flower when the days start to get shorter.
Indoors, the grower decides when they want their plants to start flowering (unless you’re growing an auto-flowering strain)
To force your plants to start flowering, you simply change the light cycle you have been using for vegetative growth.
You need to change the light cycle from 18-24 hours of light per day, down to 12 hours of light per day, with another 12 hours of complete darkness.
It really is that simple!
However, there are some things you should be aware of to do with the light cycle for flowering:
Dark means Dark!
Marijuana plants respond to increased periods of darkness by flowering.
They are NOT responding to reduced periods of light.
This means that you need to make sure that your dark periods in your space areas close to pitch black as possible and that they are NOT interrupted.
Even a small amount of light for a short time during dark periods can cause plants to delay their flowering.
This is easiest to do if you’re growing in a good grow tent.
These have flaps that cover all the places where any light could get in.
It’s also relatively easy if your grow space is in an underground room.
However, rooms with windows are more of a problem.
You’ll need to make sure that all your windows are covered in materials heavy enough to block out all light.
Even light coming through the crack under doors and keyholes can affect your flowering plants.
All the way to the end
You need to maintain your new 12/12 light schedule right up to when you harvest.
Any less than 12 hours of darkness at any stage of flowering can slow down or stop the process
Flowering plants like red light
When you’re plants start flowering, you need to expose them to a lot of red spectral light to promote the bud-producing process.
The optimal amount of red light for the flowering stage is wavelengths of 660nm.
Depending on the grow light you are using, make sure your plant is getting plenty of red wavelengths during this stage:
Fluorescents – If you’re growing with fluorescents, you might want to consider switching to a warm white 2700K for flowering.
HID grow lights – A lot of growers use the Metal Halide ( MH ) type of HID lamps for vegetative growth because of their blueish light. If you were using these, you can make the switch to HPS for flowering if it’s possible ( some HID lamps allow you to switch between MH and HPS bulbs )
LED grow lights – Most good LED grow lights give you the option of optimizing the light spectrum for flowering. Do this if you can!
Watering & Nutrients ( Flowering Stage )
Flowering is the ‘critical’ stage of bud production and your plants won’t forgive mistakes as they did in the vegetative stage.
So it’s even more important to give your plants the correct amount of water and nutrients
Growing In Soil
Nutrients – Super soils are just as good for floweringas they are for vegetative growth, so you won’t need extra nutrients for flowering in super soils. If you’re using an ordinary potting mix, you should change the nutrients you are adding to your water to ones suitable for flowering. You can use a similar ratio to the nutrients used in hydroponics ( see above ), but with the added option of using fully-organic nutrients.
Watering – In the early stages of flowering, your plants will grow really quickly. Make sure that you’re watering often enough to keep up with this growth. Check regularly with your knuckle for signs of dehydration.
Growing with Hydroponics
Nutrients – The nutrient mix you add to your hydroponic system will change in the flowering stage. You can you use the same high-nitrogen mix for the first part of flowering when your plants grow like crazy ( more on this shortly! ) However, when they start to focus on bud production, your plants need a nutrient mix with lower levels of nitrogen ( N ) and higher levels of phosphorus and potassium ( P and K ). An NPK ratio of 1-5-6 is quite common. Flowering plants are a bit more sensitive to ‘nutrient burn’, so you should reduce the strength of your solution if you notice any curling or discoloration at the tips of your plants’ leaves.
Watering – You should completely replace the water in your tanks every 1-2 weeks during flowering and clean your equipment as you do this. If possible, replace it with water that you’ve let sit for a few days.
pH during flowering
Your plants’ roots are especially sensitive to the pH of their environment when they are flowering.
Depending on your growing medium, here’s what you should do to maintain the correct ph at this critical stage:
Organic super-soil – Your soil will continue to maintain the correct pH for flowering plants and you shouldn’t have to adjust it.
‘Ordinary’ soil – Instead of waiting for problems to become visible, you can test and, if necessary, adjust pH ( see the guide above in the vegetative stage for how to do this ) every week or so during flowering.
Hydroponics – We definitely recommend being more proactive about your plant’s environment during flowering. You should regularly test and, if necessary, adjust the Ph of the water in your tanks.
Temperature & Humidity (Flowering Stage )
When your plants start to flower, they’ll become more sensitive to temperature and humidity.
The important things to remember are:
- Flowering plants need lower temperatures and lower humidity than before. The temperature should be between 18-26°C ( 65-80°F ), and the humidity below 55%.
- If the air outside your space is cool and dry, you can lower the temperature and humidity by increasing your ventilation. You can also control humidity by increasing the airflow inside your space with more oscillating fans.
- If you live in a warm, humid climate, you might have to consider other ways of reducing the temperature and humidity of your flowering plants. These include air-conditioning and dehumidifiers.
- Having a cooler, dryer environment is especially important for plants later in their flowering period.
Different stages of flowering
The changes that your plants go through during flowering are really amazing and we’re pretty
sure you’ll enjoy spending time with them during this stage.
Spending a bit more time with your plants when they’re flowering is also a good idea because there are a few things that will need to be done.
Let’s take a look at some of the things that happen and things you should watch out for at different stages of flowering
Flowering Stage 1 ( 1-3 weeks after switching your light schedule )
During this time your plants will grow.
A lot.
This is known as ‘flowering stretch’, and your plants can double in size.
They will also start to grow single leaves from the top of their main stems (colas).
These will eventually become your buds
You might have just one cola on each plant or many, depending on whether you ‘topped’ your plants during the vegetative stage.
You might even start to see white pistils grow from these sites
Things to watch out for:
- Light distance – Because your plants will be growing fast at this stage, you’ll want to keep a close eye on them and stop them from getting too close to your lights.
- Training – Instead of moving your lights away from the growing plants, you can continue the training that you might have started in the vegetative stage. Bending and tying at this stage is a good way of improving your yield.
- Stray males or hermaphrodites – You REALLY want to get rid of any males or hermaphrodites that might still be around at this stage (see the guide in the vegetative growth stage above) This will free up space for your flowering buds.
Flowering Stage 2 ( weeks 3-4 after switching your life cycle )
The extreme growth should slow down a bit at this stage ( but not stop ).
Your plants will be putting more energy into producing their flowers ( buds )
Things to watch out for:
- Smell – Your plants might start to smell at this point. Be aware of this if you’re trying to be as discreet as possible.
- Leaves – It’s normal for your plants to lose some leaves as they concentrate nutrients at the main bud sites. But losing too many leaves is a sign that you might need to adjust your plants’ environment ( pH, temperature, humidity ).
- Nutrients – Your plants will be more sensitive to too few or too many nutrients at this point. Don’t forget to add your nutrients, but be careful not to add too many. Remember that yellow or brown leaf tips often means you’re using too many nutrients.
Flowering Stage Stage 3 ( weeks 4-8 after switching your light cycle )
This is when your buds will start to get a lot bigger and fatter, and ( depending on your strain ) start smelling truly like marijuana.
Your plants will stop growing any taller and focus all their energy on growing buds.
Things to watch out for:
- Heavy buds – You might need to provide physical support for your heaviest buds towards the end of this phase. Be ready with plant ties or gardening twine ( not metal wire or thin thread, which could damage your plants )
- Problems with nutrients and pH – Even more importantly than before, check your plants regularly for signs of deficiencies or problems with the environment.
Be ready to solve these problems quickly because they can harm buds:
Temperature – If you notice new buds growing from the side of other buds (foxtails) this means that your space is too hot and you need to bring the temperature down.
Mold – As your buds get fatter, they could be hiding a disaster inside. Mold can ruin a whole crop if you don’t check your buds and keep the humidity of your space down.
How do I know when my buds are ready?
When your plant have been flowering for a few weeks, you’ll start to ask yourself when they’ll be ready to harvest.
Most growers will want to wait until their buds reach their maximum potency.
There are basically two ways for you to tell if you’re buds are ready:
1. Looking at pistils
Pistils are the long ‘hairs’ ( usually white to start with ) you can see on the buds of your plants.
You might already have used pistils to tell females from male plants since they appear early before the main flowering.
The pistils are the parts of the female plant that receive the pollen from male plants ( you won’t have to let this happen if you want the best sinsemilla buds! ).
You can watch the pistils on your plants to identify when your buds are ready to harvest.
Here’s how to use this method:
You’ll see the light-colored pistils on your plants turn dark and start to curl in towards the bud.
If you harvest before most of the pistils have changed, you’re missing out on the highest yield and potency your plants can produce.
Harvesting when 60-70% of the pistils have changed will give you buds with a more active high ( highest levels of THC ).
Harvesting when 70-90% of the pistils have changed will give you slightly heavier buds with a more relaxing high ( some of the THC will have turned to CBN ).
This method is less accurate than the following one, but you can do it with the naked eye.
It’s also worth checking out your strain online ( if you know it! ).
Some strains will have pistils that stay light-colored even when the buds are ready to harvest.
2. Looking at trichomes
Trichomes are what give mature buds their ‘frosted’ appearance, and they’re the part of the bud where a lot of its potency is concentrated.
Trichomes look like tiny mushrooms growing from the leafy parts of your buds.
Like pistils, they change when your buds are ready to harvest.
Looking at trichomes is more accurate than looking at pistils, but it’s more difficult because trichomes are so small.
You’ll need some kind of magnifier to look at the trichomes.
This is possible with a regular magnifying glass, better with a special magnifier called a jewelers loupe, and even better with a digital microscope that you can hook up to your phone or laptop.
Here’s how to use this method:
Trichomes start off transparent, then turn cloudy-white, and finally turn an amber color.
When more than half of the trichomes on your buds are still mostly transparent, your buds haven’t reached full potency and it’s too early to harvest.
When most of the trichomes are milky and some of them are amber, you’ll get buds with more THC and therefore a more ‘active’ high.
If you harvest when most of the trichomes have turned amber, you’ll get buds with high levels of THC but also higher levels of CBN, which will give you a more relaxing, ‘sleepy’ high.
Step 10 – Flushing

Flushing is when growers stop giving nutrients to their plants about a week before they harvest.
The idea is to give the plants time so that there are fewer nutrients in the final buds that you harvest and consume.
It’s difficult to prove, but most growers say that flushing will make your final product smoother to smoke.
Do I need to flush?
The short answer is no because leaving high levels of nutrients in your buds is not dangerous and doesn’t affect potency.
Whether you decide to flush or not can depend on your growing method and medium:
Organic Super-soil – you don’t need to flush because you won’t be using liquid nutrients in the first place.
Liquid nutrients for soil – Stop feeding your plants liquid nutrients in their water about 5-7 days before you harvest.
Hydroponics – Stop mixing nutrients into your tank(s) about 5-7 days before you harvest
Step 11 – Harvest

It’s not quite at simple as picking apples, but harvesting marijuana buds IS really easy.
You can use sharp scissors, but secateurs are better.
A pair of Fiskars is a cutting tool that springs open automatically after cutting, and is a favorite tool for most growers.
Wearing a pair of latex gloves is also a good idea as it stops your hands getting sticky
Correct harvesting technique
Start by cutting away the larger fan leaves around your buds.
Some growers like to keep these to use in smoothies for their medicinal benefits, but most simply throw them away.
Some growers will now just cut the main stem and prepare the whole plant for drying.
Most growers will cut each stem holding a bud individually.
Here’s our own guide on weed harvesting 🙂
Pro Tip – Make sure to leave a fair bit of the stem with the buds because this will help regulate the drying process which comes next.
That’s it! It’s now time to dry and cure your buds.
Step 12 – Drying and Curing

After you’ve harvested your buds, you’ll want to dry and cure them.
ALL of your best smoking experiences have been with buds that have been dried and cured properly.
Why should I dry and cure my buds?
Mold and bacteria – Buds that contain a lot of moisture are much more likely to be ruined by mold and bacteria. It’s not just the taste that will be spoiled either; smoking moldy buds can make you sick.
Smoothness – If you’ve ever felt you were going to cough up your lungs when smoking, it’s pretty likely you were smoking uncured or badly-cured buds. Curing leads to a smoother smoke ( a big part of this is the breaking down of chlorophyll, which causes harshness )
Effects – It’s not clear exactly why, but experienced growers and consumers have reported for decades that well-cured buds have fewer negative side effects like anxiety.
Your strain – Curing will bring out the unique characteristics of the strain that you used for your grow, including nuances of flavor and high.
Potency – Growers disagree about the effects of curing on potency, but some say that potency is improved by curing.
Drying
Drying is the first step of curing, but you can do this in your grow space without the need for containers. The good news is that it’s really easy!
Step 1 – Trim the leaves off your stems and buds
This includes the big ‘fan’ leaves and the smaller leaves on the buds themselves. Wearing gloves is a good idea because they will stop your hands from getting covered in sticky residue.
Step 2 – Hang your buds upside down
You can do this from clothes hangers, string, the struts of your grow tent if you used one, or any other method you can think of.
In humid climates, a drying rack might be useful, but this will dry your buds too quickly in normal conditions.
When hanging, make sure the is space for air to flow around each bud.
Step 3 – Wait and check
This initial drying will take around 3-10 days, but a little faster or slower shouldn’t be a problem.
You can speed up the process a bit with some fans ( DON’T point them directly at your buds) if your buds are not drying.
If they’re drying too quickly, you can try raising the humidity in your space or moving them to a more humid spot.
Step 4 – Check for the ‘snap’
You should notice the green color of your buds and stems fading as they dry.
They’re ready for the next curing stage when the buds feel dry on the outside and when you can
snap smaller stems cleanly.
Larger stems should still bend.
Curing
After your buds are dry, the next stage is curing, which is the process of storing your buds in airtight containers for 2 – 4 weeks.
During this process, your buds will continue to slowly lose moisture, but this is also when internal processes that improve the flavor and effects of your buds take place.
A lot of growers use mason jars for this stage because they have a good seal but are easy to open and close.
You can also use screw-top jars or large Tupperware boxes.
How to cure your buds
Curing Step 1 – Add your buds to the containers
Take your buds from where they have been drying and put them into your containers.
It can be tempting to remove stems so that more buds fit into less space, but big stems will still contain a little moisture that will help produce the perfect humidity for curing inside your containers.
Each container should only be about three-quarters full.
Curing Step 2 – Open once a day to check
At the beginning of curing, you’ll need to open your containers at least once a day.
This is because you’ll need to check the level of moisture and also give your buds the fresh air they need at this stage of curing.
If your buds feel wet, or they clump together when you shake the container, you’ll need to take them out to dry for a few hours before putting them back in the jar.
This is because there is a high risk of mold at this stage which could quickly ruin all the buds in a container.
Buds that feel dry or crumbly will cure way too slowly.
There is a specialist product called HumidPak which is the best method of rehydrating dry buds in a controlled way.
If your buds don’t clump together and don’t feel brittle or dusty, then you know they’re curing properly.
If the smell gets better each time you open your container, it’s a good sign that the curing process is going well.
Curing Step 3 – sample your buds
After 2 weeks you should sample your buds to see if curing for longer would be beneficial to you.
Curing can continue for up to six months.
However, for most growers between 2 – 4 weeks is a good time frame.
You’ll end up with a more mellow product the longer you leave it (some of the THC will convert to CBN, leading to a more relaxing high)
Long Term Storage
After curing, you’ll want to store your buds in the best conditions so you can continue to enjoy them for as long as possible.
The simplest option is to use the same containers you used for curing.
It’s a good idea to transfer buds from one container to another until they are as full as possible.
You should then keep your lids tight and store your buds in a cool dark place until you need them.
Freezing
Buds will keep for longer in your freezer.
You should make sure that your buds are not too moist before freezing.
In fact, it’s better for them to be a little ‘too dry’.
Tightly-packed containers are best.
Vacuum sealing
This is a great way to extend the life of your buds.
You can use easily-available bags or canisters for this job ( bags are cheaper but there is a risk of crushing your buds ).
You can combine vacuum sealing and freeze for the ultimate long-term storage.
Thanks For Reading!
I really hope you found this guide useful and that it helps you to enjoy growing your own buds!
If you have any questions, please let me know in the comments!
If you enjoyed this article, we would really appreciate it if you could share it 🙂
Originally posted 2020-09-28 16:44:32.
 James Alexander
It’s so great to see the knowledge being passed from one grower to another. It gives me hope for this world! Cheers from San Diego.
прогнозы на теннис го спорт [url=www.prognoz-na-segodnya-na-sport2.ru]прогнозы на теннис го спорт[/url] .
ставки на хоккей прогнозы от профессионалов [url=https://prognoz-na-segodnya-na-sport3.ru]ставки на хоккей прогнозы от профессионалов[/url] .
сайт ставков [url=http://www.stavki-na-sport-prognozy1.ru]http://www.stavki-na-sport-prognozy1.ru[/url] .
купить аттестат 11 классов в самаре [url=http://arus-diplom22.ru]купить аттестат 11 классов в самаре[/url] .
Цены на КварцВинил в Экспострой. [url=https://napolnaya-probka1.ru/]https://napolnaya-probka1.ru/[/url] .
Thanks for the article https://www.openstreetmap.org/user/tatianavasi9 .
Компания “Спорт-Старт” официальный продавец компании “НОРДИК СПОРТ” (Швеция(Лапландия)) в России https://sport-i-slife.ru/shop/kovriki-dlya-aerobiki-i-jogi/kovrik-dlya-fitnesa-banana-lime/
Ищете надёжного партнёра и ответственного поставщика, у которого можно приобрести спорттовары оптом или в розницу на выгодных условиях? Спешим заверить, ваши поиски увенчались успехом https://sport-i-slife.ru/shop/gimnastika/brevno-gimnasticheskoe-napolnoe/
Компания Absolute Champion – крупнейший в России производитель спортивных товаров и оборудования https://sport-i-slife.ru/shop/gimnasticheskie-mat/mat-gimnasticheskij-super-s-ruchkami-lipuchka/
Спортивное оборудование оптом Россия https://sport-i-slife.ru/shop/myagkie-moduli/sportivnyj-nabor-koleso/
«Спорт Протокол» — это крупный оптовый поставщик спортивных товаров самых востребованных производителей https://sport-i-slife.ru/shop/gimnastika/perekladina-gimnasticheskaya-na-rastyazhkah/
Наша компания постоянно развивается и идет в ногу со временем, поэтому у нас вы сможете найти огромный ассортимент спортивных товаров для покрытия любых нужд в любом объеме https://sport-i-slife.ru/shop/suxie-bassejny/shary/
Для чего нужен пилатес https://sport-i-slife.ru/shop/myagkie-moduli/tabletka/
Хоккей https://sport-i-slife.ru/shop/izdeliya-iz-plastika/igra-gorodki/
mostbet şikayətlər [url=mostbet4139.ru]mostbet şikayətlər[/url]